BackTrack is the Swiss Army knife of the security world – it is a complete operating system based on Linux and designed from the ground up to fit the needs of security researchers and penetration testers around the world.
As with all tools of this calibre it comes with a sharp learning curve, and can be daunting at first regardless of your technical background. On this site you will find several tutorials aimed at helping you to get started with BackTrack, first starting with what hardware / software you’ll need and then moving on to topics such as how to crack WIFI networks and sniff traffic using a range of tools.
Getting BackTrack
BackTrack is completely free and can be found on the BackTrack website here. At the time of writing the latest version of BackTrack is BackTrack 5 (released 10th May 2011), this is the version used throughout the BackTrack tutorials on this site.
BackTrack is available in a range of forms and the operating system can be launched in many different ways including:
- Boot from a live CD (no installation required)
- Boot from Live USB
- Install to your hard drive
- Run as a virtual machine
If you are new to BackTrack and certainly if you are new to Linux I would recommend downloading the BackTrack 5 VMWare image and using VMWare player to(or workstation if you have it) to play the image. Running BackTrack in this way is especially advantageous if you only have one PC available to you, as you will probably need to be switching between your host operating system and BackTrack – at least until you have BackTrack successfully connected to the internet and functioning on your network.
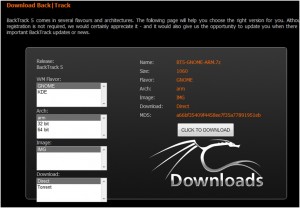
Now lets gets started! First go to the BackTrack website here and select downloads from the list of options across the top the page, you will be presented with a screen that asked you if you would like to register – or just download. Personally I have registered but ill leave that decision up to you! Assuming you just click on the download button you will be presented with the following screen:
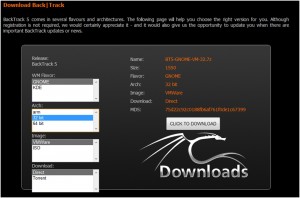
This lets you select the type of distribution you would like to download. Select GNOME from the flavor list, then 32 bit from the Arch list, you will notice that the VMWare image is now available in the Image list as so:
Note as you will read in the BackTrack forum (look here its well worth a read) both the GNOME and KDE flavours have the exat same tools available the only difference is ‘one uses Gnome as the window manager and the other uses KDE.’ For more information in the differences between the two windows managers see here.
Notice how you can now select the VMWare in the Image list, select this, then choose your download method either Direct (this will be downloaded using your web browser) or torrent, which will let you download it via your favourite torrent client.
Once you have the BackTrack VMware image you will need a VMWare player to allow you to play the image. I am using VMWare workstation, however if you don’t have access to this, you can use VMWare player for free, this is available here.
Once you have a suitable VMWare player installed, you will need to use it to open your BackTrack vmware image, first extract the image if it is zipped up, then from within your VMWare player Go to the file menu, select open, then select the BT5-GNOME-VM-32.vmx file.
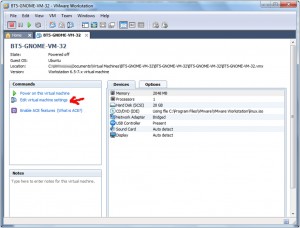
If you are using VMWare workstation you should see a screen like below:
Before running the virtual machine you first need to configure a few items, do this by select ‘Edit virtual machine settings’ (highlighted above), you will then need to configure the following:
- Set the memory to a reasonable level (depending on what you have available), Im running a host PC with 4GB of RAM so I chose 2BG – this seems to be more than enough!
- Select Network adapter and set it to Bridged, without checking ‘Replicate physical network connection state’
- Set your hard disk size to a suitable level – I used 20GB, you don’t need this much if your just experimenting though!
Click ok.
Then from the main screen (shown above) select ‘Power on this virtual machine’ if all has gone well VMWare will start to boot the image and you will soon see the familiar BackTrack loading screen. After a short while BackTrack should have loaded and you will be presented with the following login screen (note you might need to scroll down in your VMWare player to the bottom to this)
The default credentials for a clean installation are:
Username : root
Password: toor
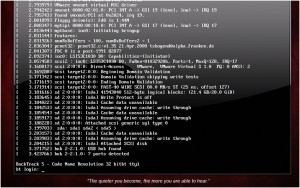
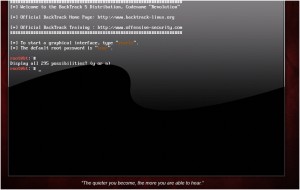
This will take you to the command line as so, (Note how it now tells you the default user name and password at the top of the screen!)
Now unless you feel like using BackTrack straight from the command line, I would recommend typing the following command and hitting enter:
> startx
This will launch the graphical BackTrack interface shown below, (minus the My Stuff folder!)
Congratulations! If you have reached the screen above you have taken the first step towards learning to use one of the best the network security tools available today!
Extra’s
If you are planning on learning to crack WIFI network or do serious network monitoring you will need a WIFI adapter compatible with BackTrack (and one that can be placed in monitor mode which allows it to listen to all traffic on the network not just traffic addressed to you!)
I would highly recommend the ALFA AWUS036h, available below as I will soon be writing guides to WIFI cracking and network analysis using this exact model.:
Also, if you are serious about getting to grips with all of the tools available in BackTrack I would recommend the following book, as it gives a good account of the tools available in BackTrack and helped me on my way to learning BackTrack.

I found your website through a random stroke of luck. It helped me do my research on this topic. I have spent lots of time looking through your site. You have something good going here, keep it up!
Hi, i read your blog occasionally and i own a similar one and i was just curious if you get a lot of spam feedback? If so how do you prevent it, any plugin or anything you can recommend? I get so much lately it’s driving me mad so any support is very much appreciated.
I generally only approve comments that are not spam, or at least prune out links that i dont think are appropriate. If you prove you aren’t span yourself i might re-instate your link
I really liked the article, and the very cool blog
Its too bad you dont write more new posts much more frequently. There are some great ideas on the topic, nevertheless I dont see a recent post from you in the past Several months (of course I may be misunderstanding how to discover new posts).
Wow! This can be 1 particular of the most helpful blogs Weve ever arrive across on this subject. Actually Excellent. Im also a specialist in this topic therefore I can understand your hard function.