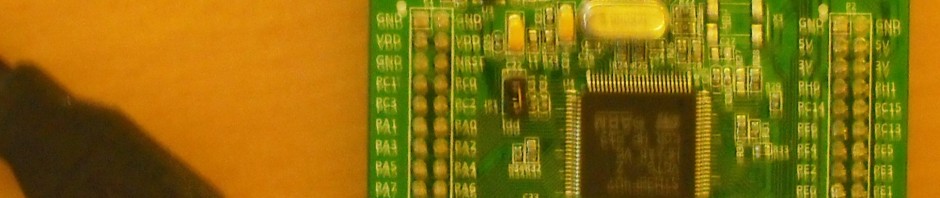
STM32F4 Discovery – Blinking LED Hello World
I’ve been playing around with my new toy, an STM32F4 discovery board to try and get to grips with some electronics! I’m by no means an electronics expert – my background is firmly set in developing software (other than some experience building Lego robots of course!)
My aim was to find a way to control physical pieces of hardware from software, but I also wanted to gain a better understanding of some basic electronic components. After discussing this with a friend, they pointed me in the direction of the STM32F4 Discovery board (you know who you are!!)
My experiences with the board have been a lot of fun, but I found that there was a lack of documentation aimed at complete beginners to electronics, so the aim of this series of posts is to help anyone else out there that would like to build some cool gadgets with this board.
Dont forget to register to keep up to date with the new posts as I add them, and i’d love to hear from you with any feedback or ideas for future articles!
Flashing Led – AKA the hello world of embedded development
Those of you that are from a software background will be all too familiar with the concept of a ‘Hello World’ program, well this post will walk you through the equivalent for the STM32F4 discovery board – A blinking LED. To start we will use one of the on board LEDs as this is fairly easy, later we will then go on to getting an LED on an external circuit to flash J
What you will need:
- Tool chain – That is a working development environment that will let you write code, compile it, then transfer it to the STM32F4 Discovery board. I’m currently using
- Eclipse Indigo as my development environment, http://www.eclipse.org/indigo/
- ST-Link tool to transfer the compiled program to the board. http://www.st.com/stonline/stappl/resourceSelector/app?page=resourceSelector&doctype=FIRMWARE&SubClassID=720
- A useful tutorial for setting up these tools can be found here: http://shareee.netne.net/wordpress/?p=5
- STM32F4 discovery board – Find tools and useful stuff here: http://www.st.com/internet/evalboard/product/252419.jsp
- USB connector to power the board and to transfer the program.

|
|
Below you will find the code listing for the blinking LED hello world program, in order to compile this program you will need to have a suitable tool chain. I am using Eclipse Indigo with the GNU ARM Eclipse Plug-in, this will allow you to compile the code into a binary ready to be transferred to the STM32F4 Discovery board; however you will also need to download some support libraries that are provided by ST, you can find what you need here: http://www.st.com/internet/evalboard/product/252419.jsp
Select the ‘design support’ tab, scroll to the bottom and download the firmware examples, this set of examples includes source code that shows you how to utilise most of the features of the board, for this example you should extract the folder, and look for the Utilities\STM32F4-Discovery folder. We will be including these files in our project, particularly the stm32f4_discovery.c and stm32f4_discovery.h files as these contain helper routines to initialise and then toggle the built in LED’s on the board.
Install Tool Chain
- Download and install Eclipse Indigo (this is a rather large download and will require Java)
- Download and install ST-Link http://www.st.com/stonline/stappl/resourceSelector/app?page=resourceSelector&doctype=FIRMWARE&SubClassID=720
- Download and install Sourcery G++ Lite https://sourcery.mentor.com/sgpp/lite/arm/portal/subscription?@template=lite
- Install the GNU Arm Eclipse Plugin, this can be done from within Eclipse see http://sourceforge.net/apps/mediawiki/gnuarmeclipse/index.php?title=Plug-in_Installation
Create your first project
Once you have eclipse up and running then it’s time to create your first project, select File -> New -> C Project. Give it a name, and select ARM Windows GCC (Sourcery G++ Lite) as the tool chain

Click next then hit finish. This will give you a new project with 3 includes to the G++ compiler already added. Add a folder by right clicking the project, selecting new folder and give it the name src, this is where are code will go.
Before we start writing code we will first add the needed STM32F4 Discovery standard device libraries, we downloaded these inside the firmware
You add a library to the includes by right clicking the project and selecting properties, then click C/C++ General, and select ‘Paths and Symbols’. The first tab here is named includes and should already have 3 of the g++ items listed. Click ‘Add’ select file system and then browse to the folder you want to add. For this example you will need to 4 paths (all within the downloaded firmware examples folders)
- STM32F4-Discovery_FW_V1.1.0\Libraries\CMSIS\Include
- STM32F4-Discovery_FW_V1.1.0\Libraries\CMSIS\ST\STM32F4xx\Include
- STM32F4-Discovery_FW_V1.1.0\Libraries\STM32F4xx_StdPeriph_Driver\inc
- The src folder you created in the project by selecting add and choosing workspace.
Your almost ready to build you just need to setup some symbols and then the linker script.
- Symbols – right click the project and select properties -> C/C++ Build -> Settings -> Arm Sourcery Windows GCC C Compiler -> Preprocessor. The defined symbols section will be blank, use the green + sign to add the below symbols

- Linker Script select ARM Sourcery Windows GCC C Linker -> General and use the browse button to find the location of the stm32_flash.ld file. (downloaded this file as part of the project see the link below). Uncheck do not use standard start files, and check remove unused sections.

You are now ready to start writing code, create a new .c file called ‘main’ in the SRC folder and copy the below code listing into it.
/**
******************************************************************************
* @file LED Hello World
* @author Lee Dyche - Tecsploit.com
* @version V1.0.0
* @date 11/11/2012
* @brief LED Blinks on and off
******************************************************************************
* @attention
* This is program is provided as is with no warranty!!
******************************************************************************
*/
#include "stm32f4_discovery.h"
//define our delay function – used to make the program wait for a certain amount
//of clock cycles
void Delay(__IO uint32_t nCount);
//This is the main entry point to the program
int main(void)
{
//this line is very important! It is responsible for setting up the LED’s
//this method is included within the provided in the STM32f4_Discovery.c
//file. It abstracts the configuration of the GPIO pins(we will get to //that)
STM_EVAL_LEDInit(<em>LED5</em>);
while (1)
{
//Turn on led
STM_EVAL_LEDOn(<em>LED5</em>);
//wait some time (this is not an accurate way to ‘wait’ but will
//do for this demo!
Delay(2194303);
//switch it off again!
STM_EVAL_LEDOff(<em>LED5</em>);
Delay(2194303);
}
}
void Delay(__IO uint32_t nCount)
{
while(nCount--)
{
}
}
Right click the project and choose build, if you have installed the tools correctly then the code should build without error. This will create a .hex file which is the compiled version of your program, all that is left to do is copy the file to the STM32F4 Discovery board and you are ready to do!
First connect your board using the USB slot (the larger socket at the top), assuming you have correctly installed the ST-Link software the board should be detected automatically, if you have trouble check the device manager you should see the board as below

If it’s not there it should appear as an unknown device and allow you to install the driver, try using the automatic install option – if unsuccessful search for ST-Link Driver version 2 and install that.
Once the board is connected correctly you should be able to run the ST-Link tool and see a screen like the one below, (C:\Program Files (x86)\STMicroelectronics\STM32 ST-LINK Utility\ST-LINK Utility\STM32 ST-LINK Utility.exe)

To copy your program you first have to connect to the board select Target -> Connect you should see a message in the console screen at the bottom, and the status at the bottom should say connected.
Once connected you select Target -> Program this will display a dialogue where you can browse to your hex file – this will be in the debug directory of the eclipse workspace for your project, and by default will be the name of the project (I would avoid using spaces in the name of your project)
Once you’ve found it hit ‘Start’ and you should see the progress bar move and then disappear, on the console you should see ‘Flash memory programmed in Xs and XXms’ – all that remains is to reset the board and your project will start running!!
Reset by either pressing the black button, or in the ST-Link click target -> connect, then target -> MCU Core -> Run.
You should see the red LED on the board start flashing!! – Congratulations you have compiled and executed your first embedded STM32F4 Discovery board using Eclipse! Now try adjusting the delay intervals, and maybe changing the LED that blinks!
Have fun!
In my next post I will show you how to use one of the GPIO pins (one of the pins sticking out of the board) in order to make an external LED blink on and off.
Download the complete Eclipse project including code, linker script and the references libraries (referenced libraries are included in the Libraries folder in the project) from here – but you will need to register with an email address to download it – Don’t worry we wont pass on your email to anyone, and we certainly wont spam you!!
Additional information can be found here:
http://shareee.netne.net/wordpress/?p=5
Note that I haven’t managed to get hardware debugging working on my board yet, as soon as I do ill make another post!
Also see a short video of the LED in action here and check out my other beginners guides to the STM32F4 Discovery board
does not work
What are you struggling with?